Summary
Introduction
Have you ever watched a train roll by? If so, you might have wondered how the train is able to stay on its tracks. The secret lies in the train's wheels. Although they seem cylindrical at first glance, when looking more closely you will notice that they have a slightly semi-conical shape. (Of course, never get close to a working train!) This special geometry is what keeps trains on the tracks. In this activity you will put different wheel shapes to the test to find out why the conical wheel is superior to other designs.
Materials
- At least four plastic or Styrofoam cups of the same size. (The cups should not have a raised edge at the top.)
- Tape
- Two rulers or yard sticks of the same length
- Book or box
- Flat workspace (that can have items taped to it)
- Flexible cardboard or construction paper (optional)
- Scissors (optional)
- Wooden skewers (optional)
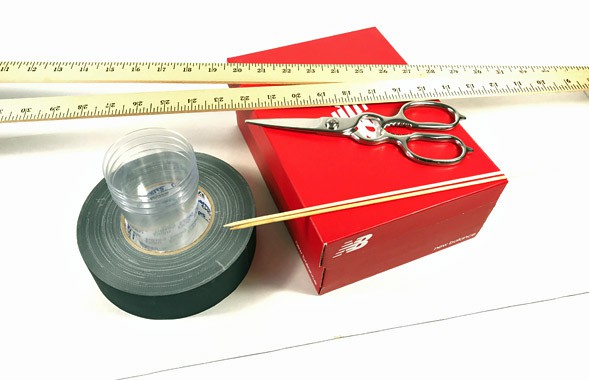 Image Credit: Svenja Lohner, Science Buddies / Science Buddies
Prep Work
- Take two cups and tape them together with their bases facing each other. This is your first cup setup.
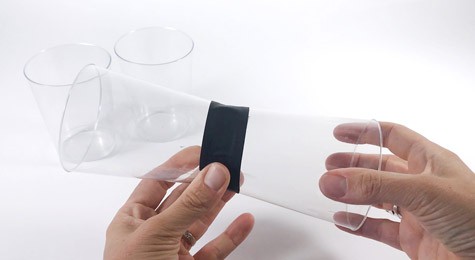 Image Credit: Svenja Lohner, Science Buddies / Science Buddies
- Take the other two cups and tape them together with their tops facing each other. This is your second cup setup.
 Can you describe the differences between the shapes of the first and second cup setup? How do they look similar or different? Which one looks more stable to you?
 Image Credit: Svenja Lohner, Science Buddies / Science Buddies
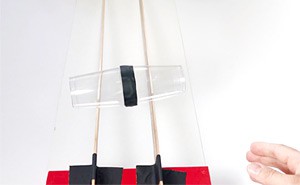
- Set up a model railroad track with the two rulers or yardsticks and your book or box. Place the rulers in parallel with one side on the book and the other on the work surface, creating an incline. Stand the rulers up on their sides so that the long narrow sides are pointing up and that you will be able to fit each of the cup setups across the track. Tape the rulers securely in place.
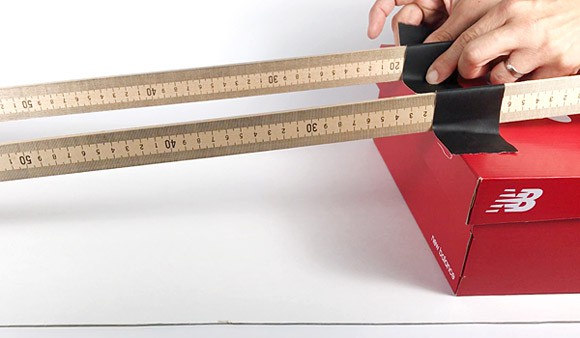 Image Credit: Svenja Lohner, Science Buddies / Science Buddies
Instructions
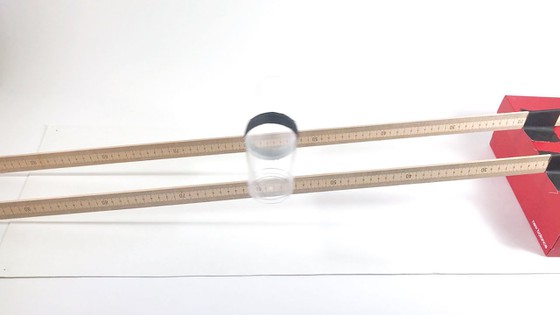
- Carefully place the first cup setup across the track at the top of the slope. Try to place it as close to the center as possible.
Why would it matter how you place the cups on the track?
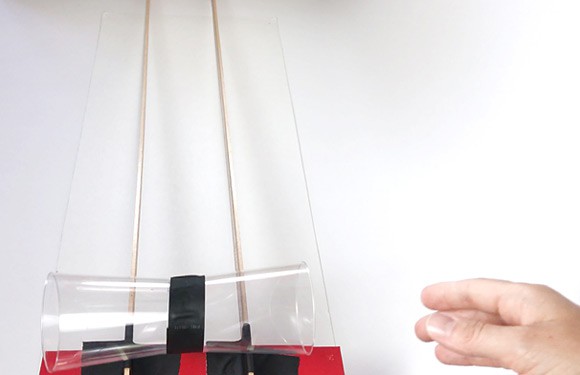 Image Credit: Svenja Lohner, Science Buddies / Science Buddies
- Let go of the cup setup, and let it roll down the track.
What do you notice? How does this cup setup behave on the track?
- Repeat this step several times and observe what happens to the cup setup on the track each time.
Do you always get the same results?
- Place the second cup setup onto the tracks. Again, try to place it in the very center of the track.
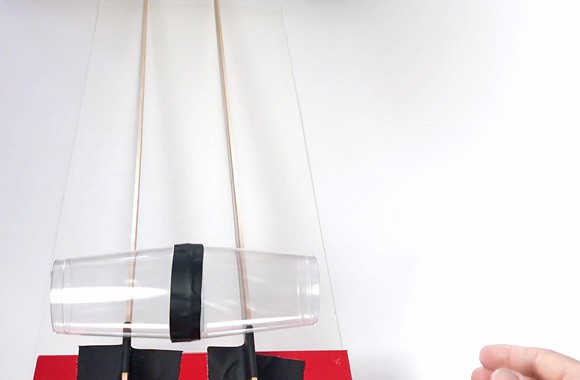 Image Credit: Svenja Lohner, Science Buddies / Science Buddies
- Let the cup setup roll down the track.
What happens this time? Are the results similar or different compared to the previous cup setup?
- Repeat this step several times and again observe what happens each time.
Do your results change with several attempts or are they always the same?
- Take the first cup setup again and place it on the tracks. This time place it there off-centered. Shift it either slightly to the left or the right.
Do you think this changes your results?
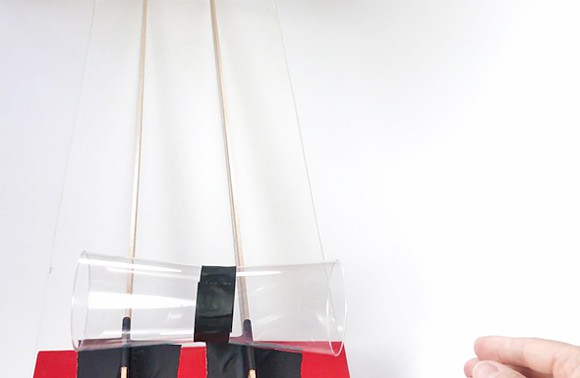 Image Credit: Svenja Lohner, Science Buddies / Science Buddies
- Let go of the cup setup, and let it roll down the track.
Does it make it all the way down the tracks without falling off?
- Take the second cup setup and place it on the track. Again, place it slightly off-centered either to the left or right.
Do you think they will fall off the tracks?
 Image Credit: Svenja Lohner, Science Buddies / Science Buddies
- Let the cup setup roll down the track.
What do you observe? Can you explain your observations?
What Happened?
The different cup setups represent different train wheel shape possibilities. Both cup setups represent a set of slanted train wheels, but the direction in which the wheels are slanted was exactly the opposite. Whereas in the first setup the outer side of the wheel had the larger diameter, it was the reverse in the second cup setup. The wheel design makes a huge difference in how the wheels behave on a track, as you likely observed.
It was probably difficult to keep the first cup assembly on the track. It should have derailed almost every time before it reached the end of the track. No matter how you placed the cups they probably usually fell off the track. This assembly only stays on the track if it is perfectly centered. But this is almost impossible to accomplish. As soon as the setup is slightly off-centered, it will derail on its way down the slope. When you off-centered the assembly to the left the part of the cup that is sitting on the left rail had a smaller circumference than the part of the cup that is sitting on the right rail. Thus, the left wheel of the train was smaller than the right wheel of the train. As a result, the whole assembly probably turned even farther to the left—in the direction of the smaller circumference wheel—and eventually fell off the tracks. The opposite was probably the case if you off-centered the assembly to the right.
The second setup, however, should have stayed on the track—even if you off-centered it. When you off-centered this setup to the left the part of the cup that was sitting on the left rail became larger than the part of the cup that was sitting on the right rail. In this case the left wheel of the train was larger than the right wheel of the train. As a result, the assembly probably turned right and corrected its position closer to the center of the track. Whenever this wheel setup became off-centered it automatically corrected its course toward the center, which makes it a very stable system.
This same principle you observed on the incline also helps the wheels stay on track when a train is turning. As the wheel sizes change when the train is pushed sideways during a turn the outside wheel (which becomes larger) is able to move a greater distance than the inside wheel (which becomes smaller). This way the outside wheel can cover more distance while rotating at the same rate.
Digging Deeper
The wheels on each side of a train car are connected with a metal rod called an axle. This axle keeps the two train wheels moving together, both turning at the same speed when the train is moving.
This construction is great for straight tracks. But when a train needs to go around a bend the fact that both wheels are always rotating at the same rate can become a problem. The outside of a curve is slightly longer than the inside, so the wheel on the outside rail actually needs to cover more distance than the wheel on the inside rail. You can demonstrate this by drawing a train track—consisting of the two rails—with a turn on a piece of paper. Take a measuring tape (or string and ruler) and measure the length of each line. The outside line of the track should be longer than the inside line. But how can one wheel cover more distance than the other one if they both are rotating at the same rate?
This is where the wheels' geometry comes in. To help the wheels stay on the track their shape is usually slightly conical. This means that the inside of the wheel has a larger circumference than the outside of the wheel. (They also have a flange, or raised edge, on the inner side to prevent the train from falling off the tracks.) When a train with slanted wheels turns the outside wheel is pushed to the larger part of the cone and the inside wheel is pushed to the smaller part of the cone (due to centrifugal force). As a result, when a train is turning it is momentarily running on wheels that are effectively two different sizes. As the outside wheel's circumference becomes larger it is able to travel a greater distance even though it rotates at the same rate as the smaller inside wheel. The train successfully stays on the tracks!
 Image Credit: Science Buddies
Ask an Expert
For Further Exploration
- Use construction paper or cardboard to design other wheel geometries. For example, try a cylindrical shape. How does this design compare to the others?
- Build a track with an actual turn in it. You can use cardboard or construction paper to do that. Make sure that your track has an incline so you can let your different designs roll down the track. How do your different designs cope with the turn?
- Instead of taping the two cups together make wheels that are connected together by a fixed axle as they are in real train wheels. You can use a wooden skewer or another straight rod as the axle. Then repeat the activity as described above. Do your results change or stay the same?
Related Resources
Links
- Science Buddies: STEM Activities for Kids
- Science ABC: How Do Train Wheels Turn?
- Popular Mechanics: The Science of How Trains Turn Without Falling Off the Tracks
- Scientific American: Rolling Race